(This post was originally published in Japanese in May 2024.
I’m translating it now — it’s already chilly outside, but this cardigan will remind you of warmer days.
Just writing about it makes me look forward to spring!)
Mesh designs are perfect for spring and summer, aren’t they?
perfect for warm days!
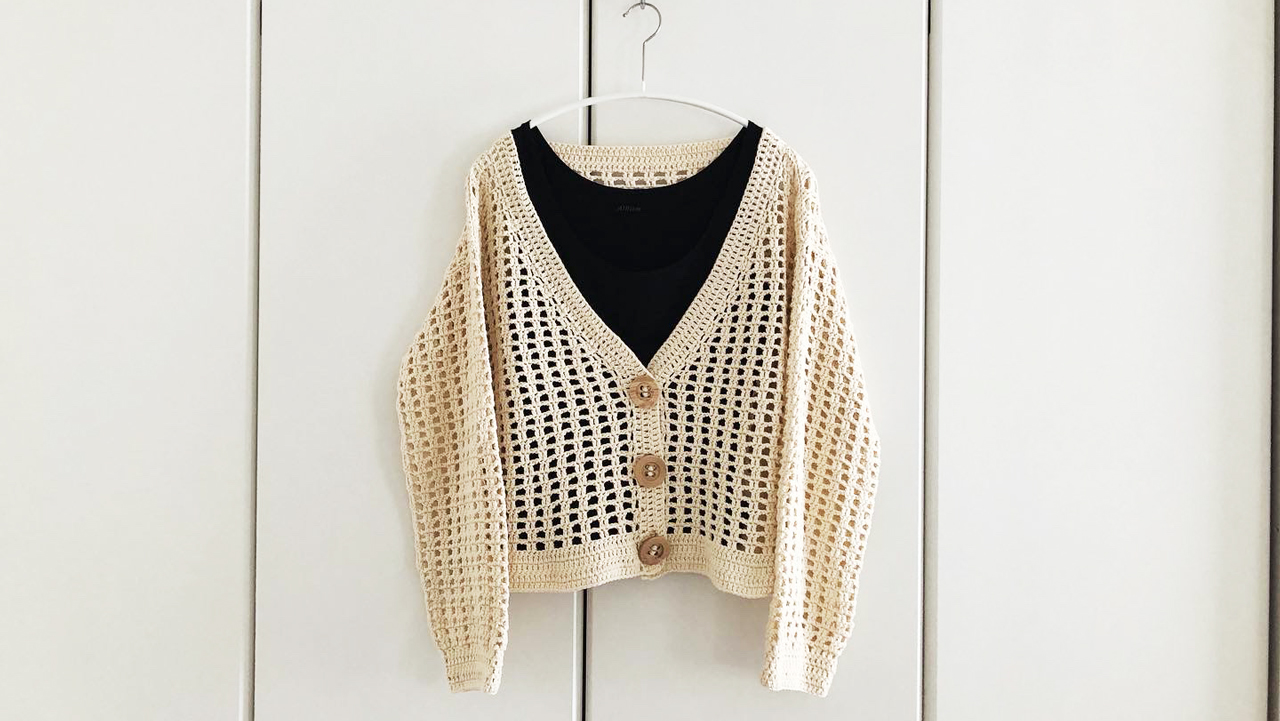
Presto Cardigan Pattern & We Are Knitters Yarn Review
This cardigan is from a we are knitters (WAK) kit.
Since it’s a kit, everything you need is included — the yarn, the pattern, and even a little paper bag with the download code.
Pattern: Download via the QR code on the package label
You can get the kit here:
(The discount doesn’t apply through this link — use the banner at the bottom to get 25% off!)

Note: The buttons are sold separately. You can find them here:
👉 Wooden Button – we are knitters
(The discount doesn’t apply through this link — use the banner at the bottom to get 25% off!)
The pattern comes in four sizes — S, M, L, and XL.
I made mine in size L.

[25% OFF applied] Go to the official We Are Knitters website (search for “Presto Cardigan Kit” on the site)
Detailed Crochet Notes, Tips, and Adjustments for the Cardigan
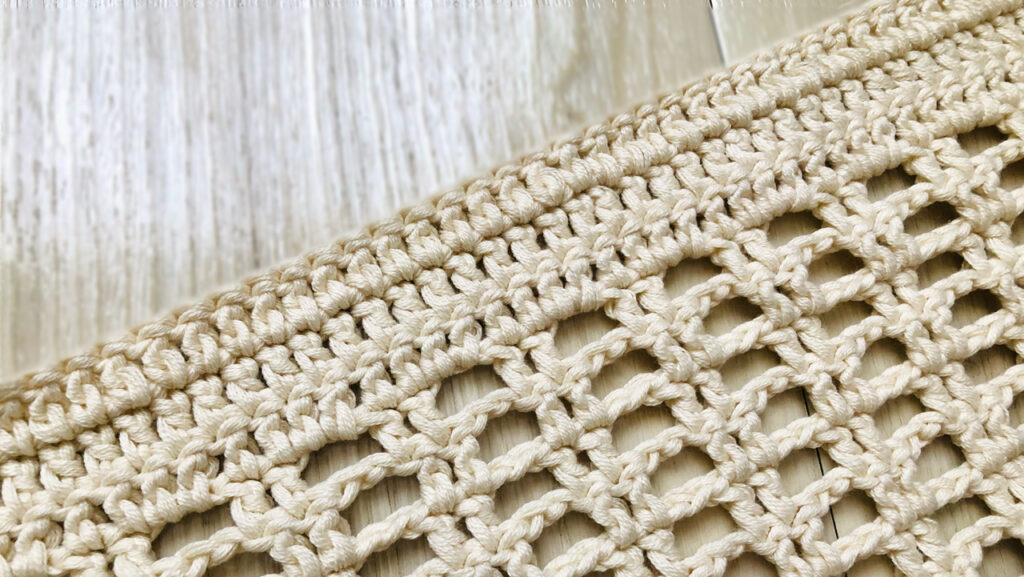
The stitches are simple — just chain stitch and double crochet (DC).
So even beginners can enjoy this project.
Critical Tip: Checking and Adjusting Your Crochet Gauge
I tend to crochet a bit loosely, so I checked my gauge often.
The recommended hook size is 5 mm (Japanese size 8),
but since my stitches were loose, I went down to a 4.5 mm hook (size 7).
I also tried to pull the yarn a little higher to get the right height on my DCs.
I started with the back panel.
After finishing the suggested rows, the length was still short,
so I added six extra rows to match the final measurement.
When I moved on to the right front panel,
I hit the correct size right away — looks like I got used to the stitch!
That meant I had to redo the back panel so the pattern would line up.
It’s always good to check your progress like this:
Final: 40 rows = 50 cm
Checkpoint: 10 rows = 12.5 cm
This way, you can avoid the heartbreak of mismatched sizes later.
The ‘Invisible Seam’ Dilemma: My Joining Method

After finishing the body pieces, it was time to join the shoulders and sleeves.
The pattern mentioned “Search for HOW TO MAKE AN INVISIBLE SEAM and HOW TO SEAM SLEEVES on the we are knitters (WAK) blog,”
but I couldn’t find the posts — maybe they were removed.
So I searched on Google instead!
Adding “crochet” to “invisible seam” helped me find the right videos.
After watching a few, I realized — this is “makikagari,” the Japanese term for whip stitch!
So I used that method.
To be honest, I wasn’t 100% sure where exactly to insert the hook,
but I went with “if it looks invisible from the front, that’s fine.”
Anyway, the seaming is done.
Crochet Tips for the Cardigan’s Front Band and Stitches
Next came the front band.
You start from the right hem, go around the back, and finish at the left hem.
Then turn and work back — it’s simple back-and-forth DC crochet.
When picking up stitches,
I usually take two stitches per row (from both the chain and the DC)
unless the pattern says otherwise.
Then I saw a strange word in the English pattern: “puntos.”
At first, I thought it was Italian for “point,” but it didn’t make much sense.
After checking the Spanish version of the pattern,
I realized that puntos means “stitches.”
So it looks like the translator forgot to replace that part in English.
Finishing Touches: Adding Buttons to the Presto Cardigan
The official photos show buttons, but they’re not included in the kit.
If you want to make it look exactly the same, you can buy them separately.
The pattern gives two options:
- BUTTON WITHOUT (no buttons)
- BUTTON WITH (with buttons)
Since the wooden buttons seem to be uncoated natural wood,
I sewed them on before washing — they looked fine after blocking.
The Finished Presto Cardigan: Styling and Final Thoughts
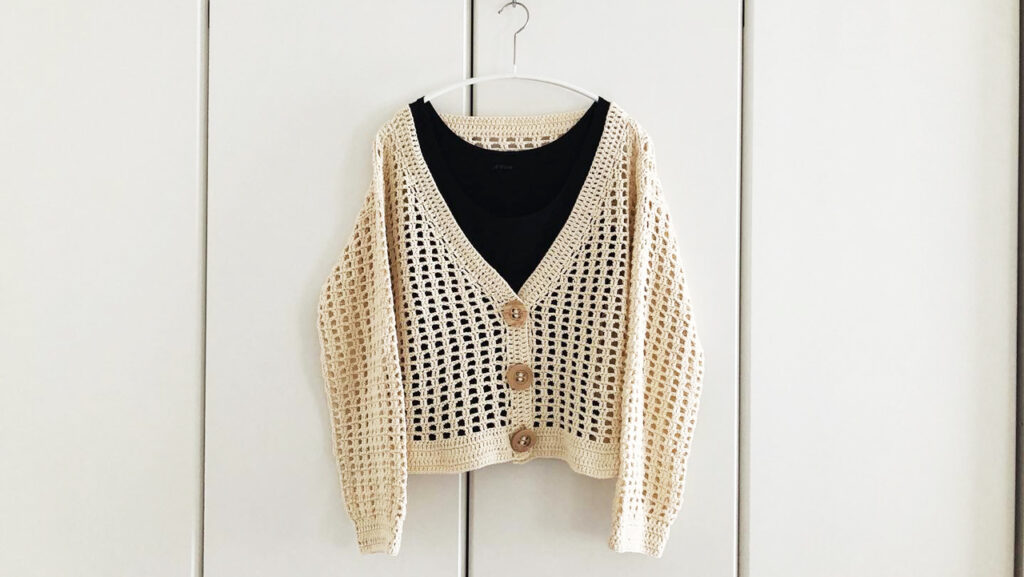
Washed, steamed, and done!
I love how it turned out.
It’s cropped, so it goes perfectly with high-waisted pants.
Maybe I should work on my abs a bit first though.
Even though crochet isn’t my strongest skill,
this we are knitters (WAK) pattern worked up smoothly and was fun to make.
Not sure if my seams were truly “invisible,” but I’ll take it as a win.
I’m looking forward to wearing it this summer
with a tank top and work pants combo.
[25% OFF applied] Go to the official We Are Knitters website (search for “Presto Cardigan Kit” on the site)