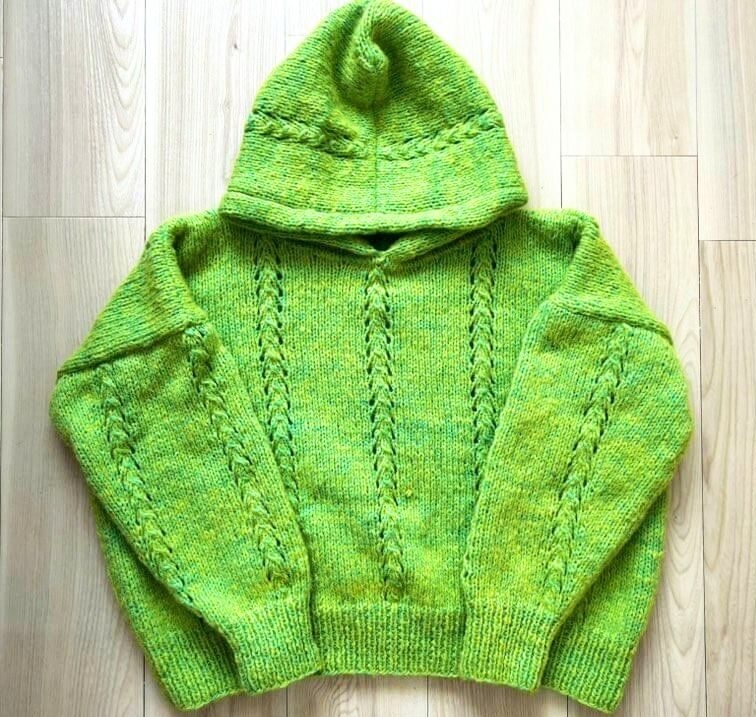
Back in early February, I started working on the Regolith pullover using DARUMA GEEK. In my previous post, I shared my process of yarn selection, swatching, and the initial progress on the body.
Today, I’m thrilled to share the final results and the finished piece!
Project Highlights & Adjustments
Learning from a previous “fail” with a V-neck cabled sweater in GEEK (which ended up way too small), I was determined to get the gauge right this time.
I went up one needle size from the pattern’s recommendation for both the ribbing and the main fabric. I chose to knit the Large size. The construction is bottom-up: Back → Front → Sleeves → Hood. By the end of the first post, I was halfway through the front panel.
Double-Checking the Width
One thing I forgot to mention earlier: after finishing the back panel, I meticulously measured the width. Since my previous GEEK project turned out “skin-tight,” this was a non-negotiable step.
Fortunately, my preparation paid off—the width was spot on with almost zero margin of error. Since the length in this pattern is “knit until XX cm,” the row gauge wasn’t a major concern. However, this means you must prepare more yarn than suggested. Even if you usually meet gauge, I recommend having extra. I had 5 spare balls on hand, so I could knit with total peace of mind.
Note: Make sure to record your exact row count for the back so the front matches perfectly!
The Sleeves
The sleeves are worked from the cuff up to the shoulder. Like the body, I followed the “knit to length” instructions, adjusting slightly to fit my arm length perfectly.
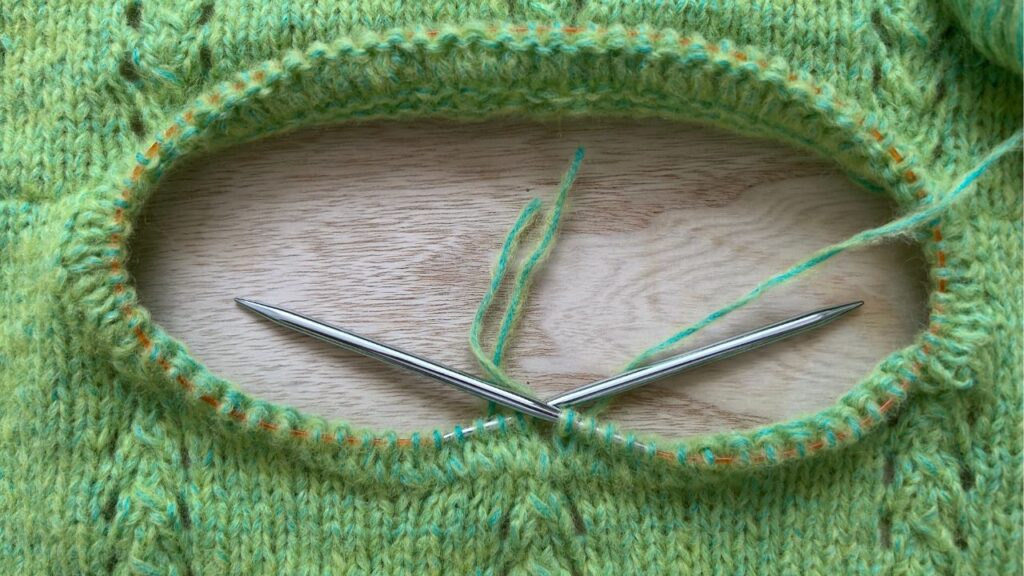
The Highlight of REGOLITH: The Hood
While the body and sleeves are straightforward, the hood pick-up and initiation really caught my attention.
The pattern includes a specific process to ensure the base of the hood is sturdy and well-structured. I won’t spoil the details out of respect for the designer’s work, but even if it’s your first time seeing this technique, the instructions are clear. (Though, I’ll admit I did consult ChatGPT just to be sure—and it helped! lol)
From there, it’s a fun journey of working flat with the textured pattern until the hood is complete. Finally, I sewed the sleeves and body together using a mattress stitch.
The Magic of The Magic of Wet Blocking
I’ve mentioned before that “steam is usually enough for Japanese yarns,” but DARUMA GEEK is a different beast. The manufacturer actually recommends wet blocking for this specific yarn to let the fibers bloom.
I used a delicate wool wash and followed my usual soaking method.
Interestingly, while most Japanese commercial yarns are known for being colorfast, the dye in GEEK bled quite a bit during the soak. Keep that in mind when washing!

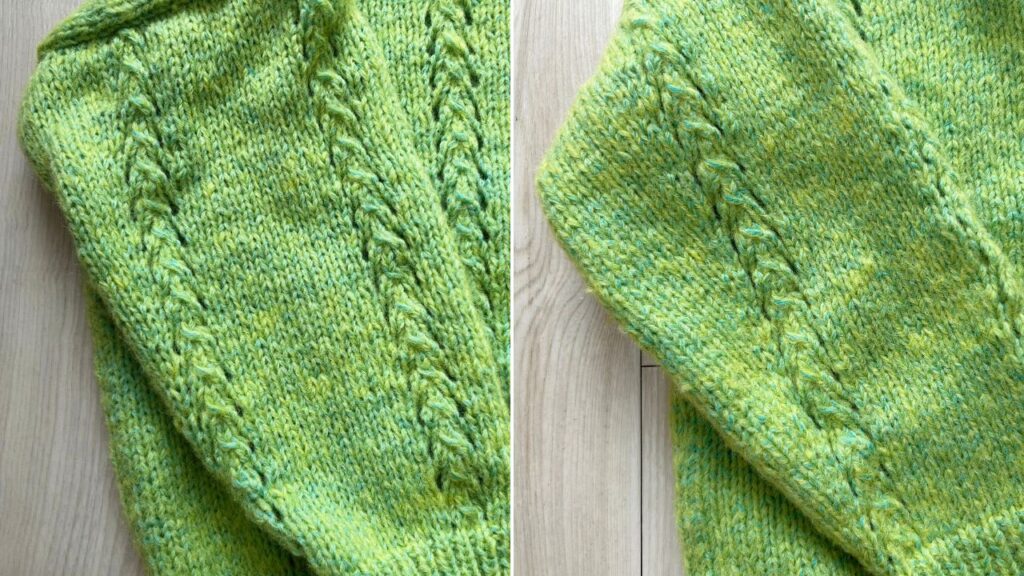
The transformation was dramatic. The fabric went from slightly “crunchy” and uneven to incredibly soft and cohesive. You can clearly see in the photos how the gaps in the stitches filled in, creating a much denser, professional-looking fabric.
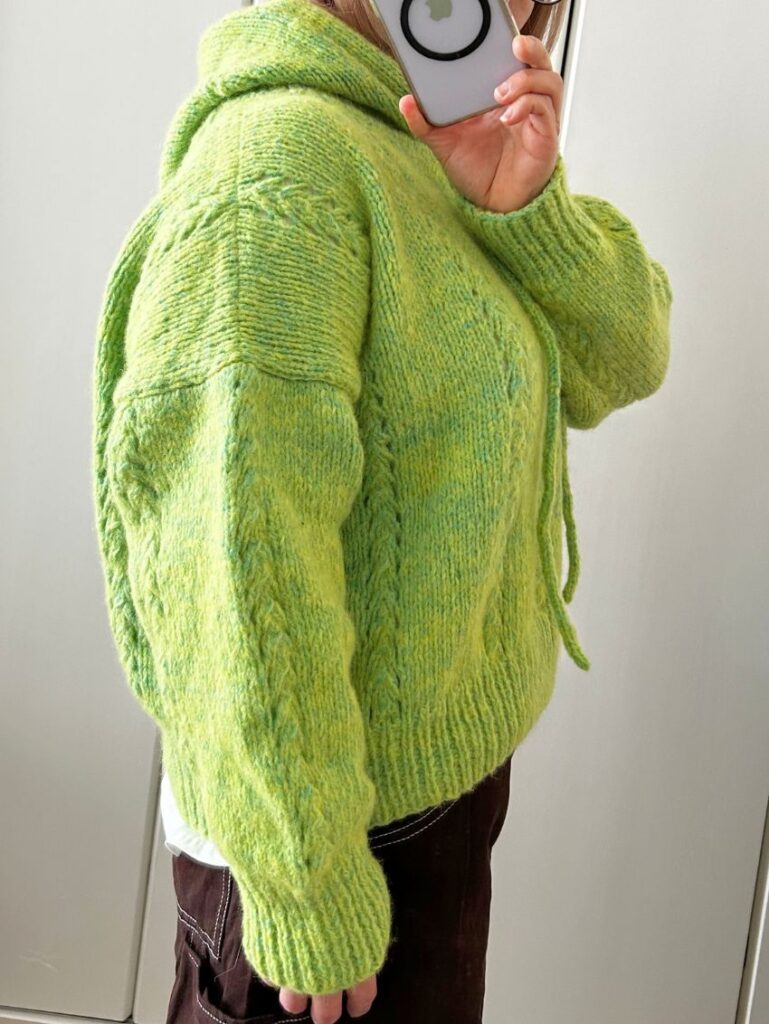
Final Review: Regolith × GEEK
The fit is perfect! I successfully redeemed myself from my previous GEEK failure.
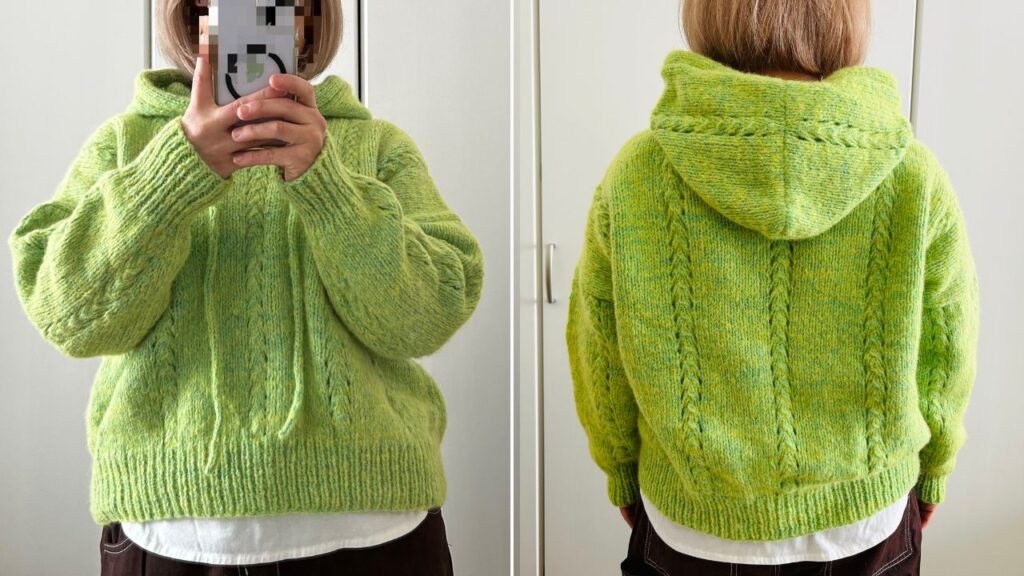
The width, body length, and sleeve length are exactly where I want them.
The texture is soft against the skin (no itchiness at all!) and surprisingly lightweight. I think GEEK would be fantastic for neck-wear like cowls or scarves too.
It’s the perfect weight to wear over a shirt as an outer layer for the transition into spring. I’m officially satisfied with my DARUMA GEEK journey. Now, I’m starting to crave some summer fibers… maybe it’s time to pick up my “FIVE” project again?